Showing posts with label Mod Podge. Show all posts

Friday, July 30, 2010

Updated Calendar

Welcome to the final day of Theme Week: Totally 80s!  The grand finale, the pièce de résistance.
When I found this perpetual calendar for 99 cents I was thrilled!  I knew it had potential.


I also thought it was funny.  
Especially the "Call Mom & Dad" reminder.
And ducks?  Ugh.


For some reason I found the 
"Happy New Year" tile to be wildly depressing.
(It's the one in the middle.)

The ducks were easy to remove since they were screwed on.  That little heart wasn't going without a fight.  It had to be chipped off with a screwdriver and hammer.  But what to put in their place?  Luckily I have a nice assortment of frames.  I chose this one.


(also 99 cents)
I painted it white...and then black.

I used some scrapbooking paper (of course) and painted the calendar and the tiles black.  Then I used a typewriter font to write the numbers and words.  


 I attached the frame with thin velcro strips so the pictures 
or quotes can be changed out.
(I wrote the "flow" by hand.  I was going to use a script 
font but they all ended up looking to me
 like they said "flaw" or "flour"!)

Days of the week

I especially like my new holiday tiles.  They are kind of generic...


...but that means you can use them more, right?

A note on perfection:  This project didn't turn out "perfectly".  The older I get, the less perfection matters to me.  If I had insisted on all the numbers and words being glued on perfectly straight (it's bothering some of you, I know!), the project never would have gotten off the ground and I think it's a marked improvement over the original.
;) 

There's still time to link up to Vintage Suitcase Friday, my relatively new link party.  Please join me!


Today I'm linking up here:

Chic on a Shoestring Decorating  
 

Thursday, July 29, 2010

Vintage Suitcase Friday! (and The Boot!)

Welcome to Vintage Suitcase Friday and Day 4 of Theme Week: Totally 80s!
Here's what I'm working with today:


It has a good shape but that 
peach ribbon and lace has to go!

I wanted a bluish green wash and luckily I had this paper on hand from Basic Grey (which must be the most ironic name ever).  

Should I have left it like this?
It looks pretty good!

It was hard to decide what kind of "trim" to put at the top.  One of my favorite things about this piece is that curvy line at the top of the boot and I didn't want it masked like it had been with the lace.  In the end I decided on some flower paper, cutting out the petals along the bottom to make a sort of lacy edge.


Then I needed some blue paint to match the paper but I wanted it to be somewhat transparent so you could still see the washed look of the paper.  The glitter paint I used on my frame yesterday was the perfect solution!  I mixed it with Mod Podge and piled it on.


Much better!

Click here for the grand finale of Theme Week:Totally 80s!
See how I transformed this!
(You're gonna love it!)


Link up here!


Tuesday, July 27, 2010

Mauve to Mahvelous, Part 2: Chunky Hearts!

Welcome to day two of Theme Week: Totally 80s!
Today's victim:


Chunk heart city


My son loves that the middle of the hearts makes a star.

My first thought was to paint it...black.  Which I did.  Then I was going to Mod Podge some crazy colorful scrapbooking papers to the hearts.  I have a lot of scrapbooking paper for just such a task.  But you know what I really wanted?  A bright yellow with a cloverleaf pattern.  I did not have that.  But I did have...

 some radiator grill with a cloverleaf pattern 

and crayons.


I ended up using crayon rubbings of items around my house.  Talk about budget-friendly!

After I did the rubbings, I cut out heart shapes and Mod Podged them on.  Here is the result, which I am quite pleased with!


The drama of black and color!


Love!

Linking to:
Life in the Pitts

Tuesday, July 20, 2010

Raven Words

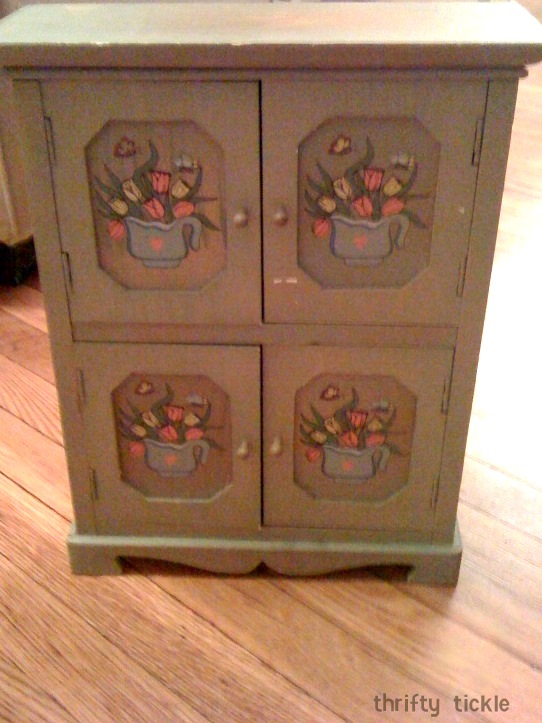
It occurred to me a few weeks ago that Wordle would make a good Mod Podge project.  I used the one that I had featured in this post and variations of it.  My "canvas" was this cute little cabinet.  


The original Wordle was not big enough to cover the four doors so I ended up making more of them (a very simple cut and paste job) and varying the size of different words to emphasize them.

Here is the "finished" product! 

I say it's finished, but is it?  I don't know.  
It may need something else.  
I've been messing with it too long.
I may have to revisit this one...

Thursday, July 1, 2010

An "Ode" to DIY and a Note to You

I really dig Ode Magazine.  They have a blog article celebrating the do-it-yourself spirit, "For example, sewing a couch cushion, growing a food garden, painting walls, or unclogging a toilet -- have you ever done these things yourself?"  Well, I wasn't going to mention it, but last week I unclogged my own toilet and it was really, um...empowering.  There I said it.  It felt good.  Let me know if you ever need to borrow a toilet auger.


A note:  My sister surprised me the other day by saying that she would never have thought of doing the projects that I have done on this blog because she's not that creative.  But the thing is, she is at least as creative as I am, if not more.  The only difference is I am "in the flow" as I like to call it.  (I don't actually call it that, but I'm sure going to start!)  Once you start creating it's kind of hard to stop.  Like a sickness.  Exercise that creativity muscle.  Mod Podge something or paint something.  Look around for inspiration.     


It's like writing.  They say if you want to be a writer, you should write every day.  See this Daily Pep Talk from a Best Friend called Today, You Become a Writer.  Today you become a creator!  Make time for it.


No excuses, OK?  We are going to get the ball rolling for you.  Only have like 10 minutes?  Go to wordle.net and create your own "beautiful word cloud" by pasting in your favorite quote or favorite attributes or whatever you want.  Then toy around with it until it is just the way you want it, print it out, hang it up on your bulletin/inspiration board and be proud of what you made!  So easy and fun!  (If you want to share, post a link in the comments section. I'd love to see what you make!)


Here is one I made using a quote from Louise Erdrich's The Painted Drum.  


Here is the text: 

Ravens are the birds I'll miss most when I die.  If only the darkness into which we must look were composed of the black light of their limber intelligence.  If only we did not have to die at all.  Instead, become ravens.  I've watched these birds so hard I feel their black feathers split out of my skin.  To fly from one tree to another, the raven hangs itself, hawklike, on the air.  I hang myself that same way in sleep, between one day and the next.  When we're young, we think we are the only species worth knowing.  But the more I come to know people, the better I like ravens.  If I have a religious practice, it is the watching of these birds.

You know, I made this quite a while ago and suddenly it occurs to me this would be great to Mod Podge on something...stay tuned!

Update:  See what I made with my Wordle here.


Thursday, June 24, 2010

100 Decorating Ideas and a Dog Bed

Better Homes & Gardens publishes a magazine I love to ogle at Walgreens:100 Decorating Ideas Under $100.  The summer issue is out and it's available only in stores.


There is no information on bhg.com.  The best I can do is point you to the facebook page.  There are definitely some Mod Podge Rocks-inspired pieces in this issue! You can see some of the photos from the magazine on the facebook page, but not the one I want to show you.  They took a table like this


and removed the doors and the top, painted the whole thing white and put a dog cushion in it!  Who knew it would make such a sweet dog bed?  p.s. I own the table above.  I got it for $5 at Salvation Army.  I have seen similar tables at other thrift stores for $40.  Look:


The truth is, a relative of yours probably has one in their basement and would love for you to take it off their hands.  Do them and your dog a favor by making it into a dog bed!

Friday, June 18, 2010

Peppermint

Several months ago, my sister sent me a link to a post by Homebody Holly about a book we had read as children.  It's about a kitten named Peppermint who was born in a candy store.


Peppermint is a "soiled white kitten" who falls into a tub of bluing right before the cat show.


It turns out to be just what Peppermint needed to win first prize.


A good friend of mine was so touched when she saw this because it had been her favorite book as a child.  Right then I knew I wanted to make something Peppermint-y for her, but what?  The idea was in the back of my mind for a while (a necklace? a keychain?) and then I saw this poor wooden cat at the thrift store.  It was so ugly I was tempted to just pass it by:

*shudder*

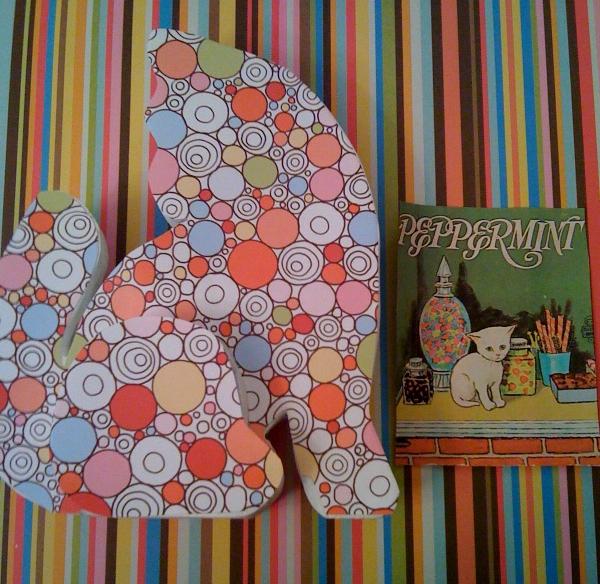
After removing the "accessories" I painted the cat white and chose two scrapbooking papers to create Peppermint.

  I love the candy look of this one.


The other side:

Oh no!  Peppermint fell into a tub of bluing!

(Apparently I took this picture before I painted the thing!)

After painting, I Mod Podged the papers on and gave it to my Peppermint-loving friend for her birthday.

Note: I don't think people use bluing much anymore, but it is a laundry product used to make dingy or yellowed whites look white again.  According to Mrs. Stewart's Bluing: "Not only does it whiten whites, it also brightens colors and does so without harsh chemicals, prolonging the life of any garment. People are seeking environmentally safe products and they know that MSB is non-toxic and biodegradable."  In the Other Uses section, it is suggested that you can use bluing (diluted) to whiten the hair of a pet.


LinkWithin

Related Posts with Thumbnails